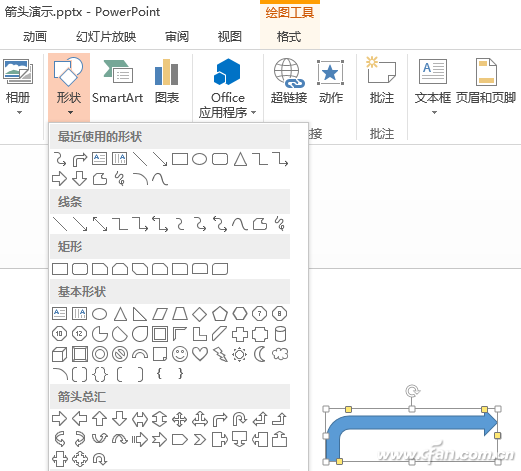
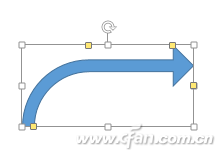
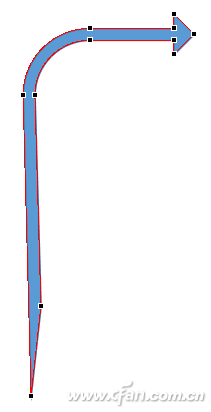
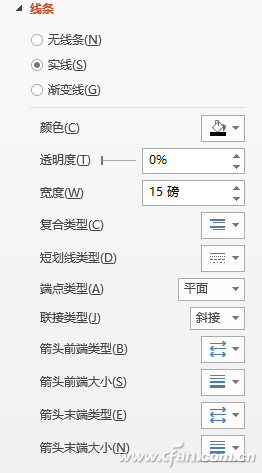
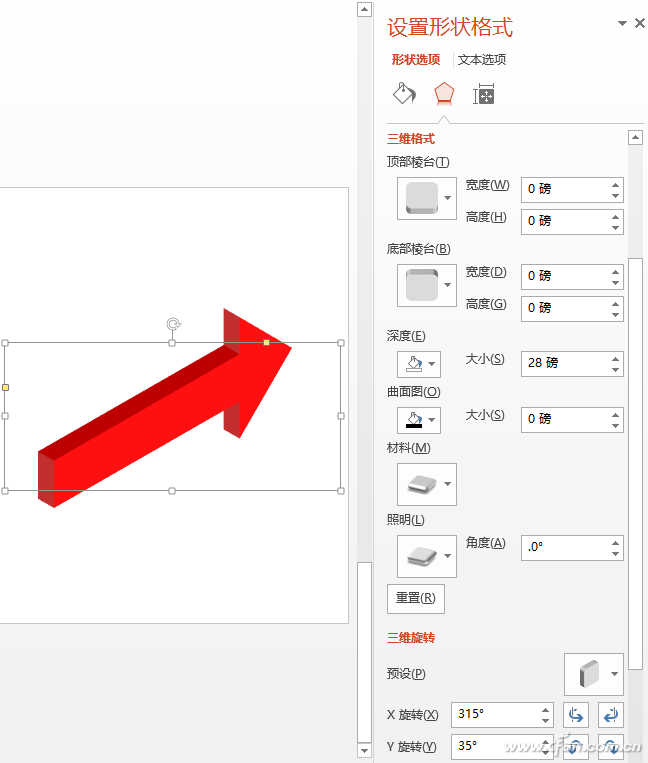
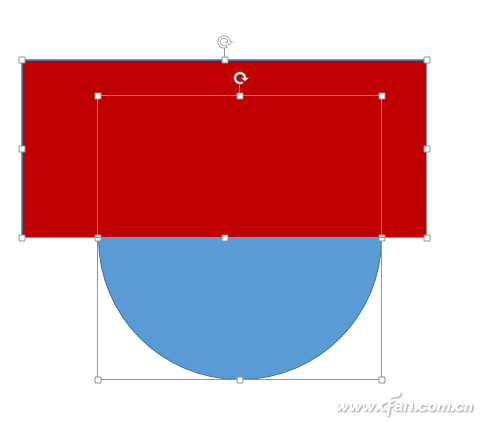
Demonstration through PPT, especially in business reports, often involves the development of certain things or phenomena, and the best way to express trends is to use directional arrows. The following is the author's summary of the PPT production arrows of several categories of programs for your reference, so as to produce their own personalized arrow map. Deformation of PPT with arrow Take PowerPoint 2013 as an example, it comes with a variety of arrow shapes. However, if these arrows are used directly, the drawn figures are often very ugly. We need to make appropriate adjustments to beautify the arrows. We first look at a rendering (figure 1). In this slide, the two arrows that serve to divide the role of the block are drawn using PPT's own graphics. Switch to the "Insert" tab, click "Shape" in the toolbar, you can see a variety of arrows in the open list, select the rounded right arrow in the "Arrow of Arrows", and draw in the blank slide An arrow shape (Figure 2). Compared with the final effect, the arrow now has three problems. First, the round corner is not round enough, and the tail is too short. The other direction is the wrong arrow. When you click this arrow graph, four yellow squares will appear on the marquee. The two small yellow blocks corresponding to the arrows are the size of the adjustment arrows. The small yellow block corresponding to the corner is used to adjust the size of the round corners. Hold down the small yellow block and drag it (Figure 3). There are two ways to solve the arrow's tail, one is to right-click the arrow, and then select the "Edit Vertex" from the right-click menu, then there will be several black small squares on the graph, any drag a small black block can change the graphics pull The tail of the long arrow (Figure 4). Another method is to use a long bar with a new fill color selection, then connect it to an arrow graphic and combine the two graphics into one graphic. As for the direction of the arrow, after selecting the arrow, switch to the "Format" tab, through which "rotate" command, go to the desired angle on it. PowerPoint also offers single linear arrows, many people use the default settings, only draw a single thin arrow (Figure 5), but in fact through adjustment, you can also achieve a very personalized arrow (Figure 5 below). The specific method is to select the drawn arrow, right-click it, select "Set Shape Format" from the right menu, and then set the width and style of the line, the shape of the arrow, and the arrow Size and so on, you can draw a personalized single-line arrow (Figure 6). PPT arrow three-dimensional three-dimensional The second idea for arrow production is to three-dimensionalize planar graphics. In the same way, let's take a look at the renderings of this example and then detail the red, curved 3D arrows (Figure 7). Switch to the Insert tab, click Shape, select the first icon in the arrow pool, draw a right arrow shape on the blank slide, and change its fill color to red. Right-click on the red arrow and select "Set Shape Format". In the right pane, switch to "Effects" (click on the pentagon icon above), expand "3D Rotation" and click on the right Icon, select a preset rotation style in the open list. Then expand the "3D format", click on the color button under "Depth", choose dark red, and then set the thickness in the "size" in the back, for example, here I set 28 pounds, a three-dimensional arrow appeared (Figure 8). The next step is to twist the arrow so that it matches the text that it fits. Right-click on the solid arrow and select Edit Vertex from the right menu. Some dark squares will appear. Drag them to distort the shape. hint: To make the arrow have enough turns, you need to add more vertices. This is done by right-clicking on the graphic's wireframe and selecting "Add vertex". In addition, it should be noted that because of the application of three-dimensional deformation, the position of the graphics and wireframes will be inconsistent when displayed, but it will not affect the adjustment (Figure 9). Combined generation of personalized arrows The above method is to deform the original graphics in the PPT to get the shape of the arrow you want. In addition, there is a common method, which is to arrange and combine multiple graphics, so that the actual more personalized arrow graphics. In the same way, first look at the final effect (Figure 10). The seemingly complicated arrow pattern is actually a combination of a quarter circle and an arrow. The key here is the production of a quarter circle. First select the ellipse from the shape and hold down the Shift key so that you can draw a perfect circle in the blank space of the slide. Then draw a rectangle, covering a half circle (Figure 11). After selecting all the circles and rectangles, switch to the "Format" tab, click "Merge Shapes" on the left side of the toolbar, and select "Intersect" from the pop-up menu. We will find that the circles are cut into semicircles. In the same way, draw a rectangle to obscure the semicircle, intersect to get a quarter circle, then draw an arrow and combine them into a single graph (Figure 12). By analogy, you can get the effect shown above. In addition to the above three categories of methods, we can also completely abandon the PowerPoint's own arrow basic shape, hand-drawn other more personalized arrows. Only if you can't think of it, if you can't do it, try a friend who is interested. Hall Sensor,Hall Current Sensor,Current Sensor Hall Effect,Open Loop Hall Effect Current Sensor Zibo Tongyue Electronics Co., Ltd , https://www.tongyueelectron.com